USB armory JTAG port
When reading further on the USB armory and thinking about the cool things I could do with it, it struck me that I couldn’t find any information on the JTAG port. There are a couple of pads on the bottom side that appear big enough for this purpose, but the documentation do not mention anything on them. A quick google revealed a tweet that confirmed my suspicions:
Had enough fun with LED debugging locore on the USB armory, so I built a solderless JTAG breakout /cc @AndreaBarisani pic.twitter.com/28CJL5JiGd
— Vince Cali (@0x56) March 30, 2015
Sweet! All that is left is figuring out what pins map to what JTAG function. Given that the hardware of the USB armory is completely open source, we can simply open up KiCad and determine the mapping ourself. For convenience, I’ve created an image that shows the functions:
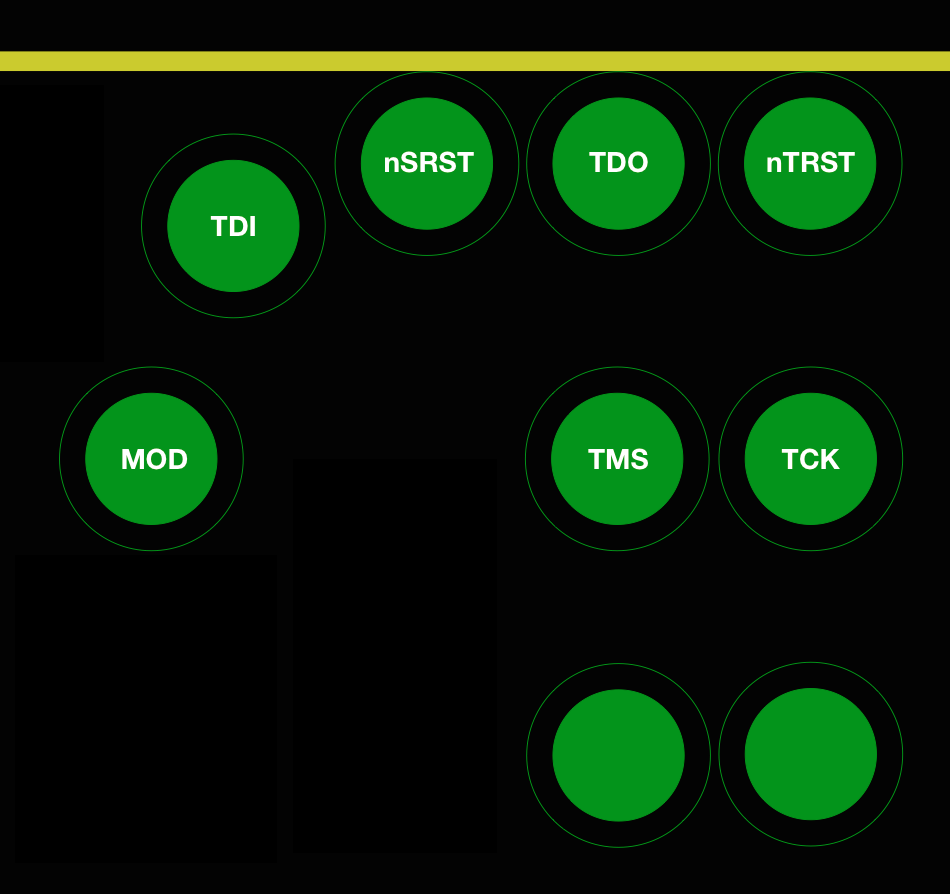
USB armory JTAG layout (bottom view)
Note that this image shows the pins as viewed from the bottom side of the PCB. All is left is create a proper shim that allows us to connect to the JTAG pins, preferably without soldering…